Monday, December 5, 2011
"sew" behind on posts!
Lol, so all the sewing has been going really well... However, the blogging part is failing! My plan is to post some pics of recent projects and let you guys ask about what ya want! Hopefully, I'll get that up soon. (Fingers crossed!)
Friday, October 14, 2011
Past Patterns 031 War of 1812 Everyday Gown
Hello lovely readers!
Here is the blog long promised regarding Past Patterns 031!
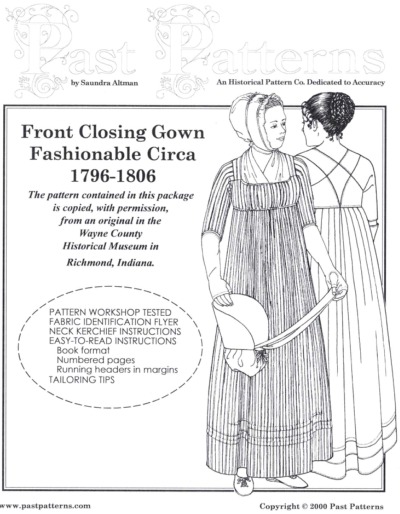
Pattern Accessibility: Perfect for Advanced Sewers
Regarding the pattern: I followed the instructions for the bodice as described. However, when it came to constructing the skirt I ran into a few issues and had to rework it.
Before Making this Dress: Make sure you know what underpinnings you intend to wear with this gown and have them made. The Federalist/Regency era has some of the most comfortable garments to wear (both inner and outerwear). If you pass the pencil test you could possibly go without stays, though wearing properly fitted undergarments will make your lovely new dress more comfortable and get the correct period look. For stays, I used Simplicity pattern 4052 with great luck. I would suggest if you have narrow shoulders to half the width of the shoulder straps for more comfort! :) The woman who made this pattern also has amazing online tutorials to help you put it together. So good!

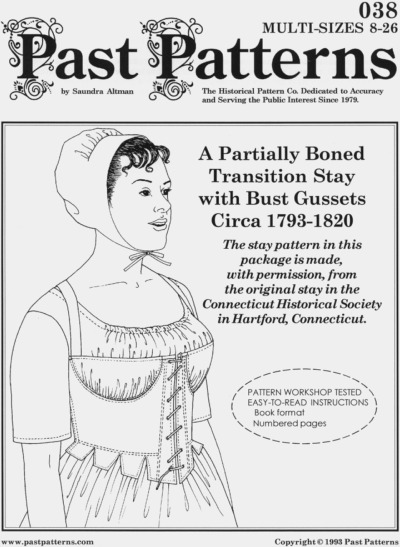
If you are a woman who needs a lot of support and likes slight waist compression I would recommend Past Patterns 038. I have not personally tried this pattern, but I like the look! This for a person who's ready for a bit more challenge from her pattern in addition to the extra support. This one is a bit more like an historical bustier. :)
Construction:
Before starting any new pattern I like to make a toile (a mock-up/trial garment). As I am so very tiny in the bust and ribcage, nearly every pattern needs to be altered. (sigh) So, I made my mock up as usual. This also gave me a chance to practice the very awkward way the bodice is pieced and figure out what HAD to be sewn by hand and what COULD be sewn by machine. (Of course, it can ALL be done by hand!!!)
Upon completion of the toile, I was DELIGHTED to discover that due to the drawstring, the dress fit without any alterations to the pattern!! Whoot whoot! Now, I could cut into the linen without fear!
 |
| Toile made of muslin and marked for right and wrong sides! |
Sleeves... Just as a heads up; I think they're EVIL! If I never had to fit a sleeve into an armsythe, I'd be a happy happy girl! LOL. However, a world of vests would be mighty cold come winter so, it's a battle we must all face. Expect to put them in incorrectly a few times. Don't get discouraged! You'll get it! Ms. Altman does a great job of notching the pattern to help get everything in correctly. Trust her, it will help. I found the sleeves a bit baggy (wide), but I think that's useful in a work dress so that you will have full mobility. I imagine you would lose some of that if the sleeve was more fitted. Also, keep in mind that dress sleeves of this period have the fullness at the TOP BACK of the sleeve. This feels super weird to the modern wearer, but makes sense for mobility. (Think of it as a cute cap-sleeve that's on the back of your shoulder rather than the top.) I found with this pattern that there was very little to "ease" into the scythe. As a matter of fact, I didn't bother to run gathering stitches at all as it fit into the arm scythe without to much fuss. Hooray!!! And, I'll be honest, I actually was able to set this sleeve correctly on the first try! So, there's hope!
 |
| Finished bodice before attaching skirt. The bottom drawstring also is not yet in place. |
Once the bodice was constructed I began working with the pattern for the skirt of the dress. After reading and experimenting with the instructions and historical information I decided to not use all of the pattern. My first problem was that if I followed the pattern in three pieces my vertical stripes would have ended up horizontal! Lol, that just wasn't going to work for me and my vertical striped bodice! So, I did the math and cut my fabric to the recommended width and a height longer than I wanted the end result (so I could add the tucks later). By changing the layout of the fabric, I also was able to make a front seam down the front of the dress salvage to salvage, thus preventing me from having to put a slit down the front. (I just pressed the seam back, whipped it into place and continued following that section of the pattern.) I also had to adjust the pleating guide to reflect this change. Then did used the pleating guide to set a the back five pleats. I also marked the stopping point for the pleats. The next step was to pleat the skirt evenly right and left until the stopping marks are reached. The pattern calls for uneven pleats on the right and left side and the kinda bothered me. I found historical precedence for even pleats in Janet Arnold's book "Patterns of Fashion." So, I went for the more even pleats as I felt it would create a more even visual line.
Remember, you certainly can follow the pattern as given! There are other ladies online who have done this with success and you can too!
 |
| Pleating the skirt. |
When it came to attach the skirt to the bodice, I also changed it up a smidge. First, I attached it as the pattern suggested. After I did that, I realized that I didn't like the way the skirt was left unfinished inside the dress. So, I pulled up just a few stitches of the back panel of the lining and laid the skirt in right side to right side then folded and press the lining. Finally, the lining was whipped it over the skirt.
 |
| Back of dress with skirt attached! |
All that was left to do was sew up the front seam and hem the dress! (whoo hoo!!) And that is what I did! (yay!)

Ok, so... not quite the last thing to do. There is also the addition of a crescent shaped tuck that prevents the dress from pulling backwards in the front and making the dress easy to trip over! (ahh!!) The hem on this particular dress is also a little deep so that later on, I can remove it and put in a few decorative tucks!!! But for now, I think the dress is in pretty good shape!

Feel free to contact me with any questions. :)
Best wishes, good luck, & happy sewing!!!
Thursday, October 13, 2011
Dear Costume Fairy!
This was to funny not to share. It seems that as soon as you learn to sew and create things well, this happens to you. And to those of you who are just learning, don't get discouraged! Please still ask questions. Hehe and maybe someday soon, someone will come to you and tell you "you're the costume fairy"! :) Enjoy!
Sometimes... this kinda happens! ("you're like the costume fairy... only taller!")
Sometimes... this kinda happens! ("you're like the costume fairy... only taller!")
Thursday, October 6, 2011
Wedding teaser trailer video!!
So... this qualifies for the "so forth" section of the blog. Our first wedding anniversary is this coming Monday and videographers posted this teaser video and I just had to share!! I'll be honest, I giggled and got a bit teary-eyed. Hope you enjoy! Happy Anniversary Love!
Click here to go to vimeo to see our trailer!
Click here to go to vimeo to see our trailer!
Saturday, October 1, 2011
Wondering what I'm up to this week? The answer, 1812 clothes!! Both for myself and the hubby. Jane Austen eat your heart out. :)
I also was able to double up with The Sew Weekly's challenge for this week to use pink! (in honour of breast cancer awareness...) whoot whoot!
Can't wait to tell you all about it soon!
I also was able to double up with The Sew Weekly's challenge for this week to use pink! (in honour of breast cancer awareness...) whoot whoot!
Can't wait to tell you all about it soon!
Tuesday, September 27, 2011
The long awaited: 1860's ballet costume/ball gown
Hello Everybody!
This poor post is a long time coming. I decided after years and years of wearing the same ballet costume to perform, I would create a new one! When the opportunity came up to perform in Frankfort, KY at "The Grand Theater" I seized the moment!
The inspiration for this gown was this lovely cotton blend I found at Joann's. I'd been looking at it forever when suddenly, the bolt got much smaller! "Oh no!," I thought and purchased the rest of the bolt at a discount!
The next step: Research and reconnaissance! I looked at ton of original pictures and drawings. Then, I dove into my stash to see what might work. Some gold dupioni looked like it might prove useful. The blue starred fabric combined with some of that silk could have resulted in a dress that looked kinda like my original sketch.
 I went ahead and made the blue skirt, knowing just what I wanted that to look like. Then, I broadened my search to find just the right fabric to make exactly what was in my mind for the rest of the costume. :) I got lucky and found a great vertical red and white silk that worked wonderfully.
A trip back to joann's with coupon for a yard of cream silk for the bodice and I was in business!
Before the bodice for the gown could be made, I had to do some restoration to my first ballet bodice, examining the construction and repairing all the silk that had fallen into terrible shape over the years. Once I was finished, I was able to make a wonderful toile and come up with an acceptable draft without to much error! (Love it when things work out!).
For the first time, I laid in tiny cording/piping around the bottom of the bodice and neckline. Fabulous! The trickiest thing that happened was that I had no pattern for the sleeves! (oh noes!) So, I made some guesstimates and luckily everything worked out!!! yayay! I think they look like mini meringues.

After making the over skirt and the bodice it was time to make the underskirt and trim everything out. The four yards of striped silk were cartridge pleated and laid onto the waistband. I found the perfect blue and gold trim in my trim stash and voila!! A costume is born!!
The next blessing was the discovery that a silk skirt I had brought back from England a few years ago was nearly a period skirt!! I removed the yards and yards of crinoline from beneath it, stripped and re-applied the waistband and added some hooks and eyes so that it could stay attached to the bodice. Suddenly, I had a brand new ballgown!!! Hooray!

The event was a huge success. Performance was a blast and the ball was lovely! Here are some pictures of the dress in action. :)


Thanks for reading!!! More blogs to come. Hopefully a bit fun, silly, and helpful!!
This poor post is a long time coming. I decided after years and years of wearing the same ballet costume to perform, I would create a new one! When the opportunity came up to perform in Frankfort, KY at "The Grand Theater" I seized the moment!
The inspiration for this gown was this lovely cotton blend I found at Joann's. I'd been looking at it forever when suddenly, the bolt got much smaller! "Oh no!," I thought and purchased the rest of the bolt at a discount!
The next step: Research and reconnaissance! I looked at ton of original pictures and drawings. Then, I dove into my stash to see what might work. Some gold dupioni looked like it might prove useful. The blue starred fabric combined with some of that silk could have resulted in a dress that looked kinda like my original sketch.

A trip back to joann's with coupon for a yard of cream silk for the bodice and I was in business!
Before the bodice for the gown could be made, I had to do some restoration to my first ballet bodice, examining the construction and repairing all the silk that had fallen into terrible shape over the years. Once I was finished, I was able to make a wonderful toile and come up with an acceptable draft without to much error! (Love it when things work out!).
 | |
| Image of both ballet bodice sleeves. The one on the left is post restoration, the one on the right prior to repair. |

After making the over skirt and the bodice it was time to make the underskirt and trim everything out. The four yards of striped silk were cartridge pleated and laid onto the waistband. I found the perfect blue and gold trim in my trim stash and voila!! A costume is born!!
 | ||||||
| Ballet costume without completed sleeves and playing with sash that later was scrapped for something I'll build later. :) |
The next blessing was the discovery that a silk skirt I had brought back from England a few years ago was nearly a period skirt!! I removed the yards and yards of crinoline from beneath it, stripped and re-applied the waistband and added some hooks and eyes so that it could stay attached to the bodice. Suddenly, I had a brand new ballgown!!! Hooray!

The event was a huge success. Performance was a blast and the ball was lovely! Here are some pictures of the dress in action. :)


Thanks for reading!!! More blogs to come. Hopefully a bit fun, silly, and helpful!!
Monday, August 29, 2011
"Sew" it begins..
Well, I've been dreaming of doing this blog for a long time. Mostly, it was a clever name in my head but no guts to try it. Today, it begins! Be prepared for puns of fun! (hehehe) I hope you enjoy it! :)
Current project: new 1860s ballet costume. Stay tuned for details and pictures!!
Current project: new 1860s ballet costume. Stay tuned for details and pictures!!
Subscribe to:
Posts (Atom)